


Odoo to Power BI – connecting the world’s fastest-growing open-source ERP to Microsoft’s BI platform sounds straightforward until you hit API limits, nested data models, and the question of where to actually store the data.
Odoo now serves over 16 million users worldwide, with $712M in revenue in 2025 and a trajectory toward $1B by 2027. It’s the ERP of choice for a growing number of SMEs and mid-market companies across manufacturing, wholesale, retail, and services. But Odoo’s built-in reporting – while adequate for operational checks – wasn’t designed for the kind of cross-source, drill-down analytics that finance and operations teams need in Power BI.
This guide covers the real integration options, their trade-offs, and the approach that gives you a reliable data foundation for Odoo reporting in Power BI.
What data lives in Odoo
Odoo’s modular architecture means the data you’re working with depends on which apps you’ve installed. A typical implementation generates data across accounting (journal entries, invoices, payments, tax records), sales (quotations, orders, revenue by product line), CRM (leads, opportunities, pipeline stages), inventory (stock moves, warehouse transfers, product variants), purchasing (purchase orders, supplier invoices), HR (employees, timesheets, expenses), and project management (tasks, time tracking, profitability).
Under the hood, Odoo runs on PostgreSQL with a consistent table naming convention – module_model format. The key tables for Power BI reporting are typically account_move (invoices and journal entries), sale_order and sale_order_line (sales data), crm_lead (pipeline), stock_move (inventory), and res_partner (customers and suppliers). The relational structure is deep though – a single invoice can reference dozens of related tables through foreign keys and many-to-many relationships.
Four ways to connect Odoo to Power BI
There’s no single “right” approach – the best method depends on your Odoo hosting, data volume, and how many sources you need to combine. Here are the realistic options.
1. Direct PostgreSQL connection
If you self-host Odoo, you can point Power BI directly at the PostgreSQL database. This gives you raw SQL access and fast query performance – custom SQL queries against Odoo’s Postgres database can outperform API-based imports by 5-10x.
The catch: you’re querying a production database. Odoo’s schema is highly relational and not well documented for analytics use. Complex reports can slow down your Odoo instance for end users, and opening external access to the database creates security risks including data leaks and potential SQL injection. Every Odoo upgrade can break your Power BI models if table structures change. This approach also doesn’t work at all for Odoo Online (SaaS) or Odoo.sh customers, since they don’t have direct database access.
2. Odoo API connectors (XML-RPC / JSON-RPC)
Several third-party connectors (CData, WebKul, Odoo Apps Store modules) use Odoo’s XML-RPC or JSON-RPC APIs to push data into Power BI. These work without direct database access, making them compatible with Odoo Online.
API limitations to know about
3. Manual CSV/Excel exports
The low-tech option: export reports from Odoo as CSV or Excel files, then import them into Power BI. Zero cost, zero automation. It works for one-off analyses but breaks down the moment you need daily reporting, historical tracking, or data from more than a few Odoo models.
4. Data warehouse approach
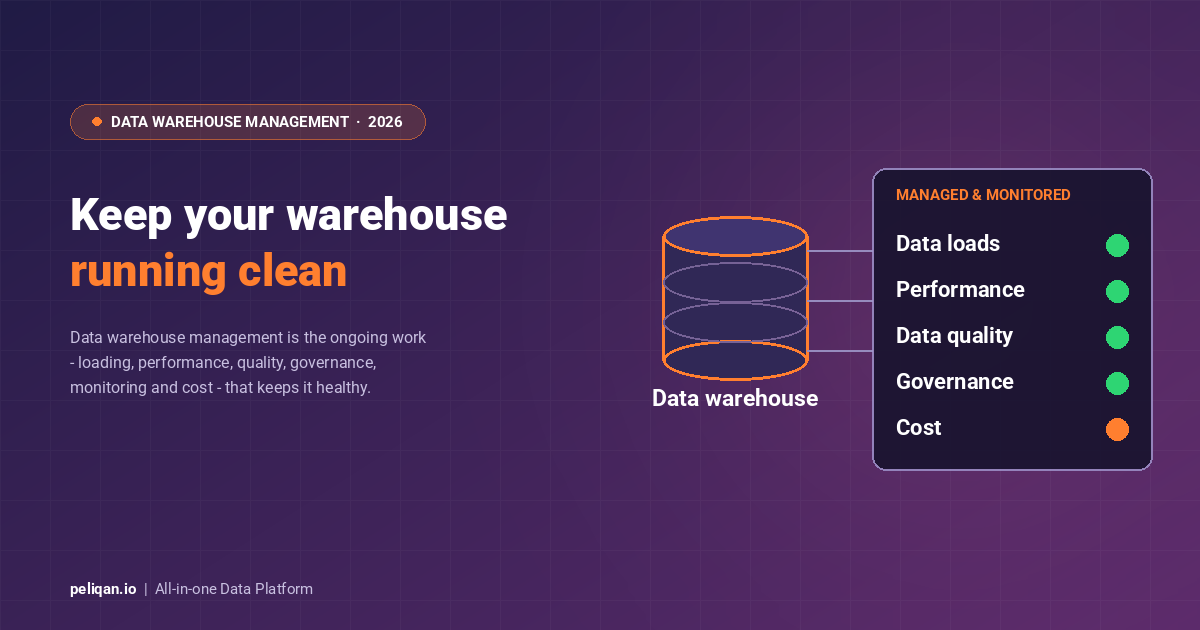
Replicate Odoo data into a dedicated warehouse, transform it into an analytics-ready schema, then connect Power BI to the warehouse. This is the approach recommended by most BI practitioners for anything beyond a single dashboard, because it separates your reporting layer from your production system. More on this below.
Comparing the four methods
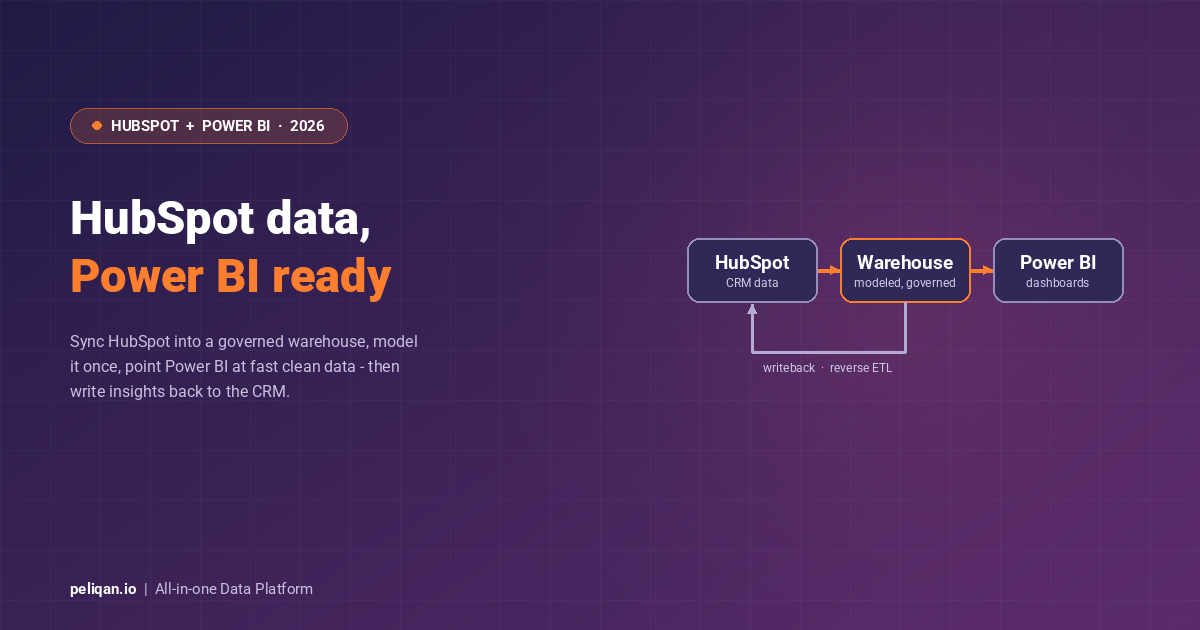
The data warehouse approach – connecting Odoo to Power BI through Peliqan
The warehouse approach decouples your reporting from Odoo’s production system. Instead of querying Odoo directly – whether through the database or API – you replicate the data into a dedicated analytics warehouse, transform it into a clean schema, and point Power BI at that.
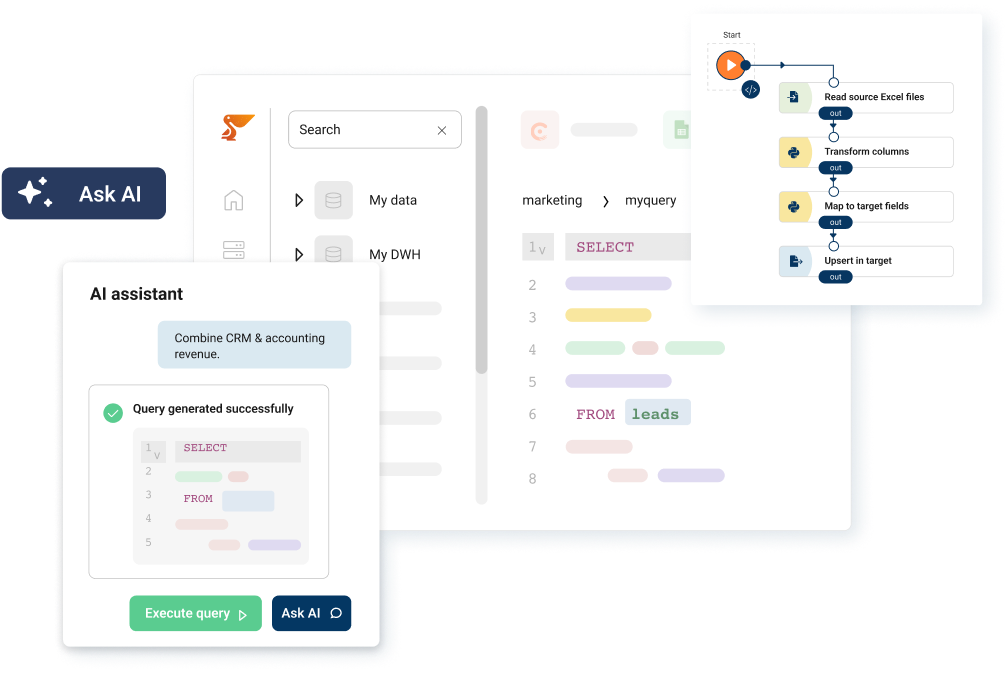
Peliqan includes a pre-built Odoo connector that handles OAuth authentication, incremental syncing, and automatic flattening of Odoo’s nested relational structure. The setup takes about 10 minutes.
How it works with Peliqan
Example: SQL query for Odoo revenue by product in Peliqan
Once your Odoo data is in the warehouse, you can write standard SQL against it. Here’s a query that calculates monthly revenue by product category – something that would require multiple Odoo report exports and manual Excel work without a warehouse:
SELECT
    DATE_TRUNC('month', so.date_order) AS month,
    pt.name AS product_category,
    SUM(sol.price_subtotal) AS revenue,
    COUNT(DISTINCT so.id) AS order_count
FROM sale_order so
JOIN sale_order_line sol ON sol.order_id = so.id
JOIN product_product pp ON pp.id = sol.product_id
JOIN product_template pt ON pt.id = pp.product_tmpl_id
WHERE so.state = 'sale'
    AND so.date_order >= '2025-01-01'
GROUP BY 1, 2
ORDER BY 1 DESC, 3 DESC;
Peliqan’s AI-assisted SQL editor can also generate queries from plain English – ask “show me total revenue by customer for 2025” and get working SQL against your Odoo schema. These queries can be saved as materialized views that refresh automatically with each sync.
Connecting Power BI to the Peliqan warehouse
In Power BI Desktop, select Get Data, choose PostgreSQL Database, and enter the connection credentials from Peliqan. You’ll see all your Odoo source tables plus any transformed views. Because Peliqan preserves Odoo’s foreign key relationships, Power BI auto-detects most table relationships – saving significant time compared to building the data model from scratch.
Peliqan also supports reverse ETL, which means you can push insights back into Odoo. Flag overdue invoices, update customer segments, or sync calculated KPIs back to Odoo records – all through low-code Python scripts in Peliqan.
Real-world example: OdooExperts
Top Odoo partners like Dynapps, OdooExperts, ERPopen, and Rezolv use Peliqan to deliver data warehouse and BI solutions to their clients. OdooExperts consolidated reporting across 50+ client environments using Peliqan’s multi-customer management, turning “can we also get this in a dashboard?” into a repeatable, white-label service. Learn more about the Odoo partner program.
Multi-company and multi-instance reporting
One of the most common challenges for Odoo users is consolidated reporting across multiple companies or Odoo instances. A manufacturing group with separate Odoo databases for each subsidiary, or an Odoo partner managing dozens of client instances, needs a way to bring everything into a single Power BI dashboard without manual exports.
Peliqan handles this by connecting multiple Odoo instances to a single workspace, automatically tagging records with company identifiers. You can build consolidated financial reports across all entities while still allowing drill-down to individual companies. Combined with row-level security in Power BI, each stakeholder sees only the data they’re authorized to access.
Skip Power BI entirely – query Odoo data with AI
Not every question needs a dashboard. With MCP (Model Context Protocol), you can connect Odoo data to AI assistants like Claude or ChatGPT and ask questions in plain English.
Peliqan provides an MCP server that connects to your Odoo data through the same warehouse sync.
You can set up the Odoo MCP connection in minutes.
Once running, you can ask questions like:
- “What’s our total revenue this quarter compared to last quarter?”
- “Which customers have outstanding invoices over 90 days?”
- “Show me the top 10 products by margin this month”
- “How is our sales pipeline converting by stage?”
The AI queries your warehouse directly – the same governed, transformed data your Power BI dashboards use. For ad hoc questions from executives or operations managers who don’t want to wait for a new dashboard, this approach delivers answers in seconds instead of days.
When to use AI vs. Power BI for Odoo reporting
- Use Power BI: Recurring dashboards, board-level reports, visual KPI tracking, anything shared with a team on a regular cadence
- Use AI/MCP: Ad hoc questions, one-off data pulls, exploring data before building a dashboard, non-technical users who need answers without learning Power BI
- Use both: Build your core dashboards in Power BI, then use MCP for the 80% of follow-up questions that don’t justify a new report
Combine Odoo with other data sources
Odoo rarely exists in isolation. E-commerce businesses run Shopify or WooCommerce alongside Odoo. Marketing teams use Google Ads and Meta Ads. Payment processing goes through Stripe or Mollie. And some organizations run a second accounting system like Exact Online for specific entities.
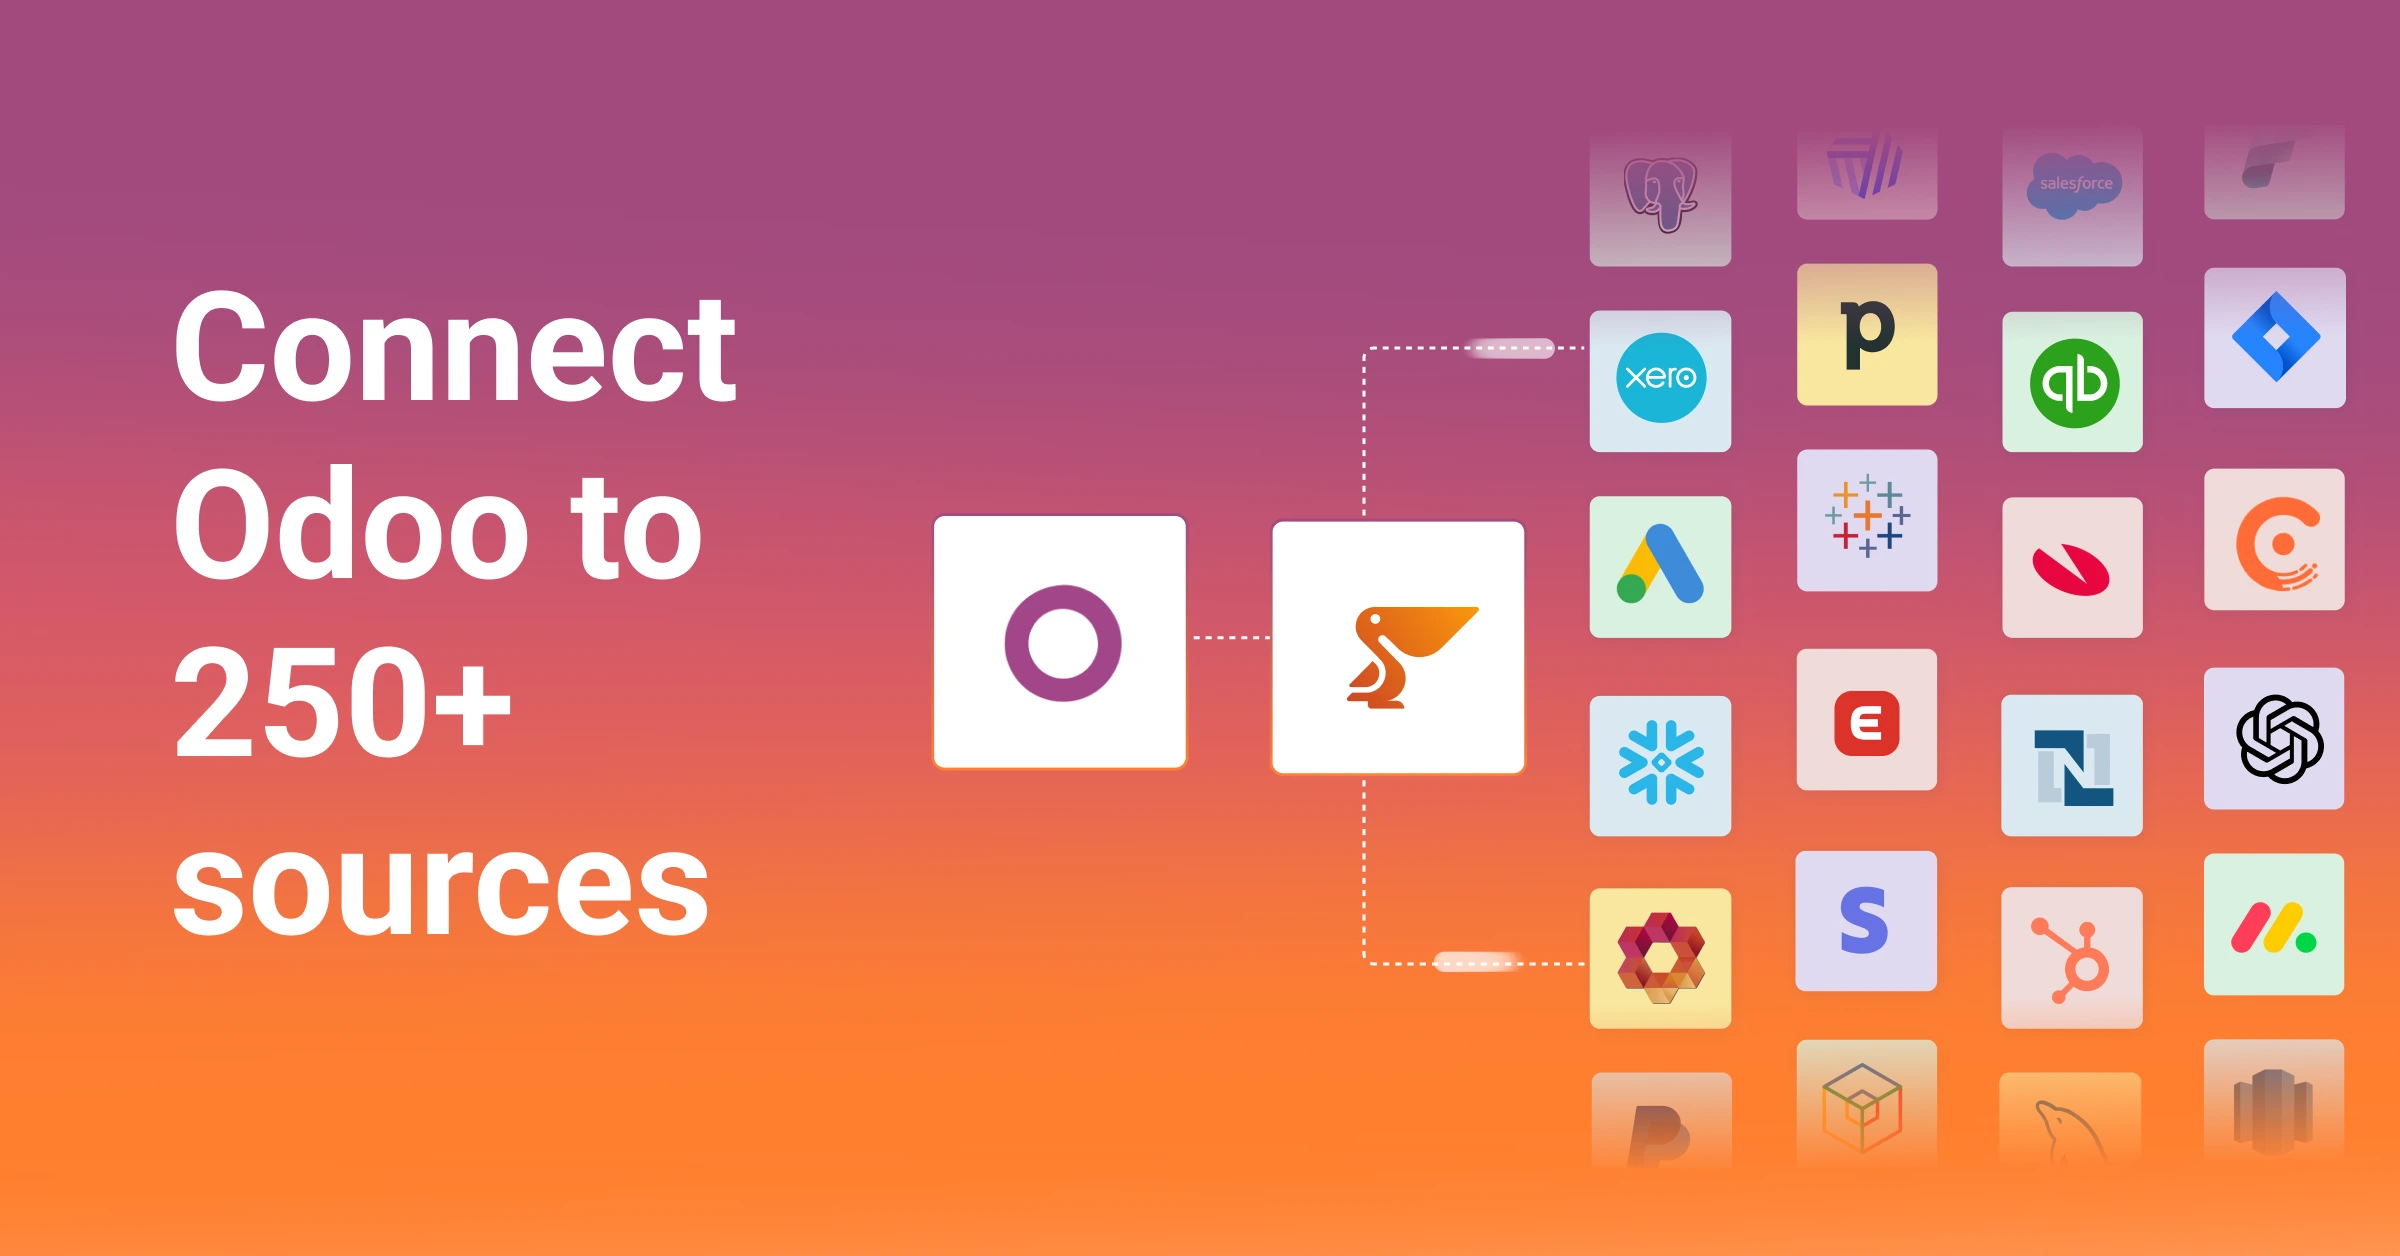
With Peliqan’s 250+ connectors, all of these sources land in the same warehouse. You can build Power BI dashboards that combine Odoo sales data with Shopify revenue, Stripe payment reconciliation, and marketing spend – giving you a true 360-degree view of business performance that no single-source Odoo connector can deliver.
For custom data pipelines, Peliqan’s low-code Python environment lets you build complex transformation logic, calculated KPIs, and even machine learning models on top of your combined dataset – all within the same platform.
Getting started
If you’re currently exporting CSVs from Odoo, fighting API rate limits, or maintaining a fragile direct database connection for Power BI reporting, the warehouse approach eliminates these problems without requiring API development work.
Peliqan offers a free trial with the Odoo connector included. Connect your Odoo instance via OAuth, select your models, and plug in Power BI. SOC 2 Type II certified, fixed pricing from ~$199/month, and a 2-week SLA for custom connector requests if you need integrations beyond the standard 250+.
Build your transformations in SQL or low-code Python before connecting Power BI, keeping your BI models lightweight and fast.
For Odoo partners looking to offer BI and reporting as a service to their clients, Peliqan’s white-label option lets you deliver a branded data platform from day one – no infrastructure to manage, no ETL pipelines to maintain.